
Snapshot: We often need to replace our motorcycle’s brake pads and after reading the below story you are never gonna need a mechanic to do that for you.

There are a few things in a motorcycle that can be serviced or changed in no time and brake pads sure are one of these things. Brake pads are supposed to be changed every 5,000kms to 10,000kms and good quality pads can improve the brake feel and make the ride safer. There are good quality brake pads easily available in the market which can easily be installed and won’t need any replacement for a long time. So in the article today we take you on a swift tour to teach you brake pad replacement in easy steps.
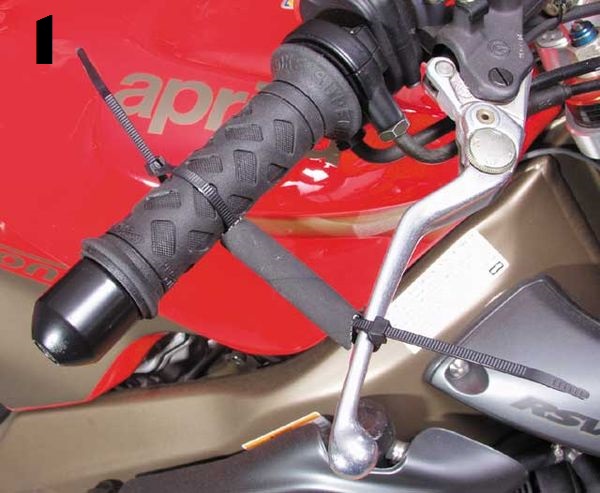
The first thing you’ve got to do is to take the bike on the center stand to make the process easy. Once it’s on the stand it becomes easier to adjust the bike as per need. After the bike is mounted properly make sure to block the brake lever because in case if it isn’t, it can accidently be pressed while the setup is disassembled pushing the piston out of their bores. You can use a length of fuel line to block the lever by placing it between the grip and the lever. Tie a zip-tie around the grip through the hose of the fuel line to the brake lever and that should be it (1).
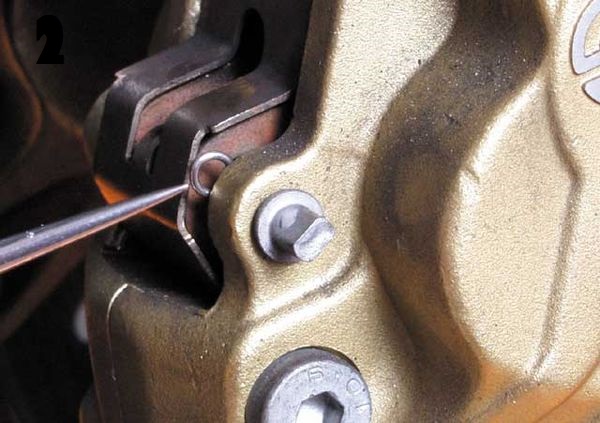
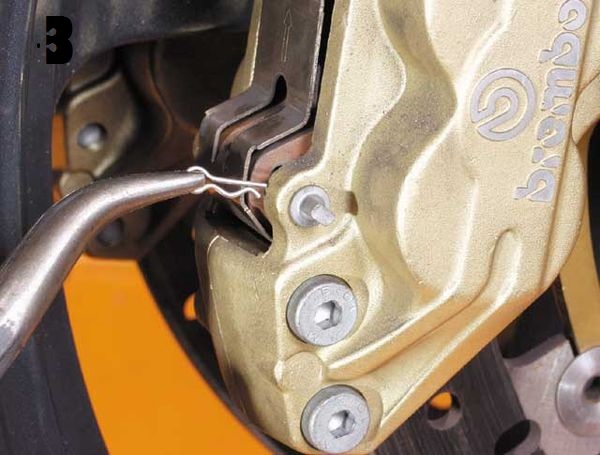
The brake pad replacement can be done without removing the bolted calipers out of the fork legs but it is recommended you take it off so as to have a closer look at the components. In order to see the loop end of the retaining clips (2), rotate the retaining pin and then carefully pull them out with the use of a needle-nose pliers(3). In some high-end braking systems, like the ones visible in the picture, these pins also keep the dust shield intact at the place which might slide off when pins are removed.
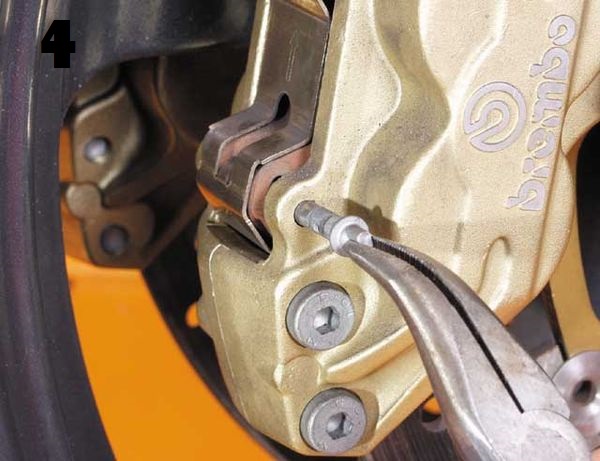
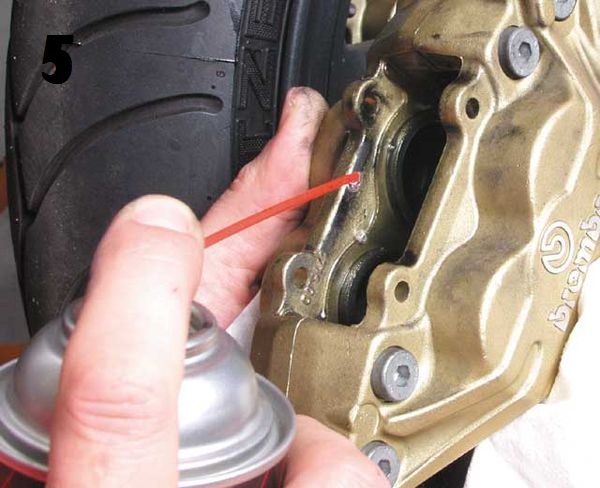
The pads should fall out as soon as the retaining pin is removed and is pulled out from the caliper, if not then a little caliper shake would do that (4). Inspect for wear and tear, cracks while the telltale lines will tell you exactly what’s going on with the pads. Before chucking them off make sure you use some aerosol brake cleaner to clean pads residue around the caliper pistons (5). You should also push the pistons backward in their bores to the same place after reinserting the old pads and wedging a screwdriver (or anything similar) between them and then taking them out finally (6). Also, keep a check if the master-cylinder reservoir’s fluid isn’t peeking out from some place.

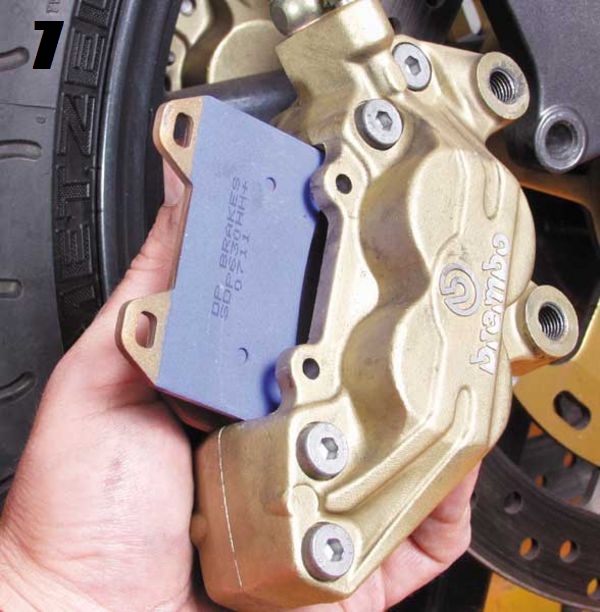
After preparing the new brake pads make sure you go through the direction to make sure if you need original squeal shims or the old ones will do (7). While inserting the pads make sure you don’t spill or stick any grease on the faces of the new pads and that’s obvious why. You can reuse the old retaining clips in case they are good as new and aren’t damaged. The last thing remaining after this is the bolting the calipers to the fork leg and it is done.
Remove the lever block and squeeze the brake until it feels firm, also check the master cylinder fluid level at the end.
Images: Motorcyclistonline.com
Leave a Reply